Mar 10, 2025 • Adrian T
How to edit Google Docs without wifi or internet access?
Google Docs is a fantastic tool for collaboration, but did you know you can edit your documents even when you’re offline? Whether you're traveling in the plane, have no internet access, experiencing internet issues, or simply want to work without distractions, Google Docs’ offline mode has you covered. Here’s how to set it up.
Step 1: Enable Offline Mode
Before you can edit documents offline, you need to enable offline access. Follow these steps:
-
Open Google Drive in Google Chrome (offline mode works well/only in Chrome).
-
Click on the gear icon (⚙️) in the top-right corner and select Settings .
-
Scroll down to the Offline section and check the box next to "Create, open, and edit your recent Google Docs, Sheets, and Slides files on this device while offline."
-
Follow the instructions on the screen: To turn on offline access, install the Google Docs Offline extension to your Chrome browser
-
Click Done to save the settings.
Step 2: Make Specific Docs Available Offline
Now that offline mode is enabled, you need to select which documents you want to access offline:
-
Open Google Drive and locate the file you want to use.
-
Right-click the document and select "Available offline."
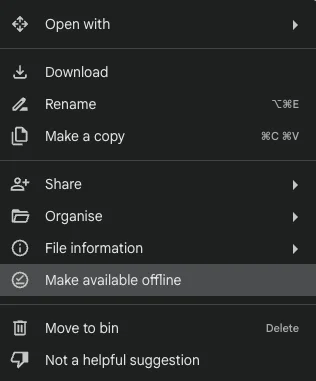
-
A checkmark icon will appear next to the file, indicating it's ready for offline use.
-
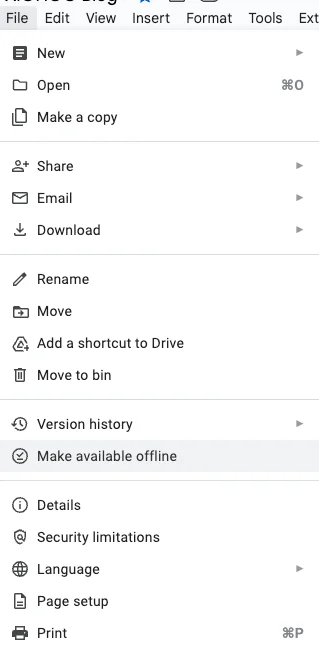
Or if that Google Doc you want to make offline is open, go to top-left, click on
Step 3: Editing Your Docs Offline
Once offline mode is enabled and your document is available offline, you can:
-
Open Google Docs in Chrome (even without internet).
-
Edit documents as usual.
-
All changes will automatically sync once you reconnect to the internet.
Bonus Tip: Use the Google Docs Mobile App
If you're using a phone or tablet, open the Google Docs app, tap the three-dot menu next to a document, and toggle "Available offline." Now you can edit without Wi-Fi!
By setting up offline access, you can stay productive no matter where you are. Happy writing! ✍️🚀
Related Posts

AEO vs. GEO: The Marketer's Guide to AI-Driven Search Optimization

Is Blogging Dead in 2026? The Ultimate Guide to Starting a Profitable Blog Today

Technical SEO for Developers: Building a High-Performance Foundation

How to Write SEO Content That Ranks High: A Comprehensive Guide

Unlock Your Potential: A Treasure Trove of FREE AI Tools at Your Fingertips!

How to Delete a page in Google Docs

How to change Margins in Google Docs

Essential Google Docs Shortcuts to Save Time
